Wednesday 16 February 2011

My Completed Website

 This is my enter page which i made mostly in Photoshop.
 This is my home page. The pictures, products, contact and the info pages have go the same layout just different content.
 This is what you will see if you click on thumbnail image in the pictures page. The left and right arrows either side of an image take you to the next or previous image
This is the page which can be found through the products page. this page here takes you to three other pages.
 This is one of the pages which you will be navigated to from the previous page which is the image before this one.
 This will come up if you click a bmx bike in the bmx bikes page. Again the left and right arrows navigate you to the next or previous product.
This will come up if you click a bmx component in the bmx components page. Again the left and right arrows navigate you to the next or previous product. There is also a few more pages which show bmx accessories which is layed out in the same way this one is.

Evaluation

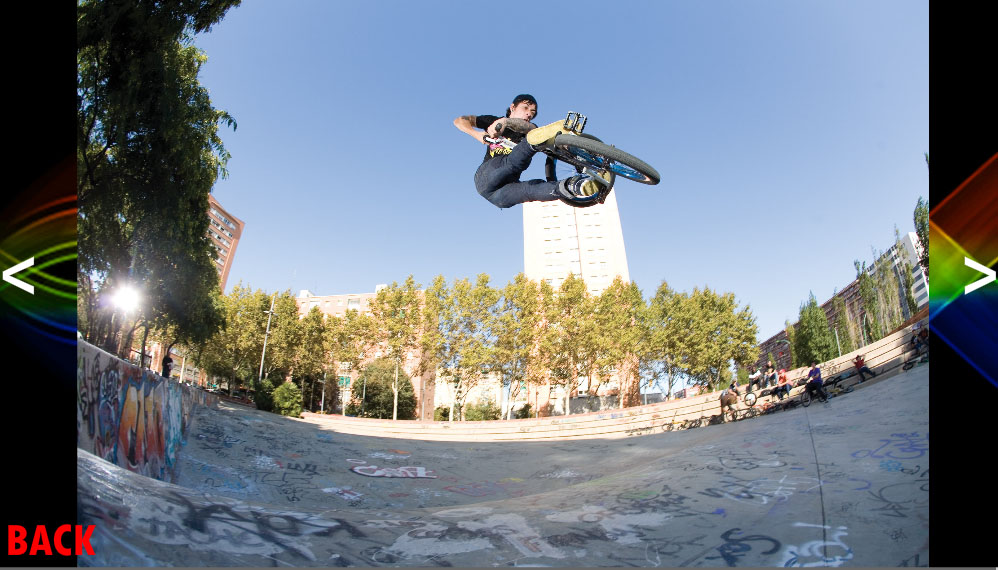
The subject that I had to complete for his capture unit was to create a website. We could use any form of capture of our choice to be included in the website in way or another. My chosen method of capture was photography. I chose photography because I think its a good way of capturing as through one photograph it could tell a whole story or just show something spectacular or in my case show stuff for other people to see. I decided that my websites theme was going to be based upon bmxing. I chose bmxing because I have always found it fun and interesting and used to do it as a hobby.

When it came to the website designing I decided to make it quite simple yet different. The simple part was that I would have the normal web pages such as the Home, Pictures and info page which can be found on most websites. The different part to my website was that I wanted to use a fair amount of 3D effects throughout the website. I think that I have achieved it and works well with the website.

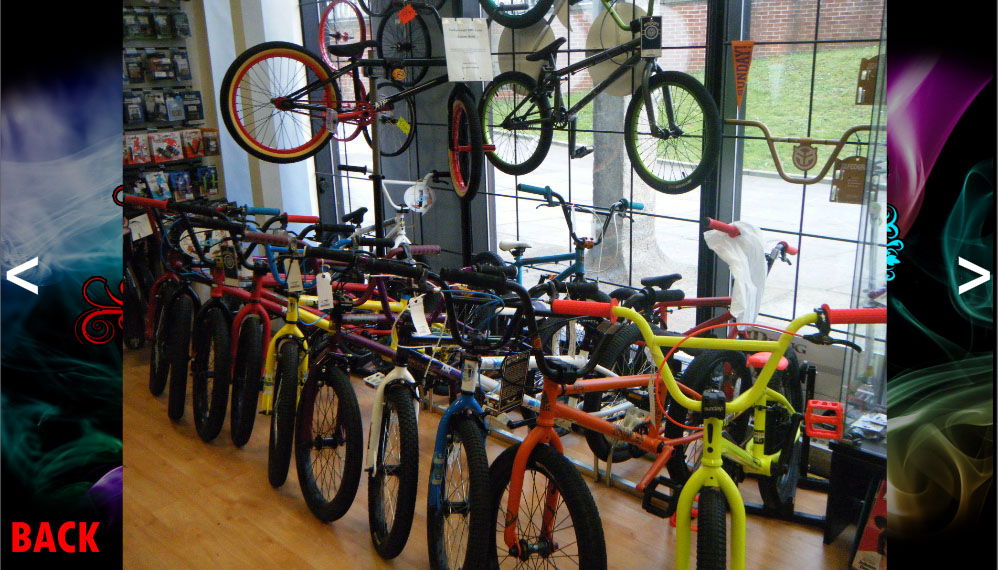
I started off by going to a local bike shop and take some pictures of bmx's, bmx components such as handle bars, pedals, rims etc. and accessories for bmxing like protective gear. I took a range of photos and then placed them into my website as it was in production. I used these images that I taken as backgrounds, advertising a variety of products and also used these images as pictures just to look at. 

What worked best for me was that it was easier to get the exact image that I want as I had them on a camera, rather than finding one on the internet as it might not be how I want it or the same colour. This helped as it saved me some time and could just get straight into my website designing.

In future projects I am almost on hundred percent certain that I would something on the lines of photography as it gives you an endless image selection of what you want. This could help in most projects as it saves time, helps you get what you want, exactly how you want it. I would probably still make my website in flash I know what to to within this programme.

The research side of this worked helped out quite a bit as it helped me look at other peoples work and gave me a better understanding of what to do to make an image look good. Also I looked at the history of photography and it was interesting to see how its evolved over a period of time not that great. Looking at old photographs also shows the original methods of photography which showed me that photography has almost been used for the same reason and has never changed. The artistic side of photography was different in a way as it has been used for pieces of work to show off and show how good they are at what they do.

Next time if I were to do this again I would most probably change the theme to something which can make me experiment more with photography. This would be a plus side as it would help me get an even better knowledge of this method of capture and also I could possibly produce photographs of a high standard with a lot of though put into them.

From this project I have learned several new things the first one being the history of photography. this was good as it shows how long its been around for and the new ways of taking images. Also I now have a better understanding of Flash which is very useful as I will be using this software more during my time at college. I also feel a lot more confident using Flash now. As well as learning some new skills on Flash I also learned some on Photoshop as I used this programme to edit some images and make the designs for my buttons, text boxes and the 3D structure of my website.


Tuesday 15 February 2011

capturing experiment

As a group we decided to carry out this experiment using photography / filming. Our idea is to film a 3 - 4 min video of outside the college whilst my group stand still on shot. We would then fast forward the film in a programme so it looks like everything is going fast but we are stood still.

Web Plan

here i have created an image of which is the outline of my website and how it will work and where it will navigate to.

Wednesday 9 February 2011

Creating my Website

To start with i opened up flash and created a new document to the size in which i would be working in. I then added some pictures of a BMX shop, which i took my self a couple of weeks back, as backgrounds for each page. I then created some boxes in photoshop in which i would put on each page to have some text inside. After this i created buttons in photoshop and saved them as a png format so when i opened them in flash the wouldn't have a white background behind them. I imported all of these objects into flash and started putting the website together. I then imported the buttons into flash and made them into a button by pressing f8 and made them change colour when the mouse rolls over them. these buttons will be there throughout my website. Once this was done i made them so when clicked they would take you to separate pages of my website. I also imported an image of my logo which i had previously made into my website. I then went on to creating my 'enter' page. I made this in photoshop along with an enter button. I then placed these into photoshop and did the same process with the enter button as i did with the others so when clicked it would navigate you to my home page.

 After this part of constructing my website, I went on to creating my pictures page by making various different images into a very smaller state so I could fit several of them on to this page. With these images made and imported into flash, i converted them to buttons so when clicked they would navigate to a new page of an enlarged version of the image just clicked. I added a back button on the enlarged images to make navigation easier. Now my website was starting to take place I decided to start on my products page. I basically used the same method as i did in my pictures page just these small images would take you to different web pages and images. I then made my 'on-line' and my 'in store' pages. these were made in the same way as the previous pages just you could only navigate to them through my products page. Also these had images of the products I had taken in the BMX shop which i placed into different sections on thee pages.


I then decided to go onto making my info and contact page. All i did on these two pages was put information for contacting and info about the website and what to do if you get stuck with something. I also added a few images to make them less boring as they just had text.

Tuesday 8 February 2011

3D Text Effect Imgae

Today we leaned how to create a 3D text image in photoshop. I started off by creating a new document with a black background and then duplicated it and then put a gradient from black to white on this new layer. I then made a new layer with the word D&B on it. I then add edited it in the repousse part of photoshop and added and excrusion to it to make the ext 3D. I then converted the text layer and the gradient layer into a 3D postcard and merged them together using the 3D merge option. After this I used several tools within the 3D menu to make the gradient face upwards from the floor, the text sit on top of that gradient and finally place a light in the corner shining down on the text which gave a shadow on the floor as well. I then opened the text layer in a new tab in photoshop and changed the colour to a light blue which changed the colour of my original image as well.


Wednesday 2 February 2011

LINKS

Stage 1: Investigating past and current practice in capture
http://jwrightson2capture.blogspot.com/2011/01/past-current-practice-in-capture.html

Stage 2: Planning your capture


Stage 3:Exploringandexperimenting


Statement Of Intent

How Photoshop Has Influenced Current Practice

Adobe Photoshop is a programme in which people are able to edit photos and images. It was originally invented by two brothers who made several changes to the programme in which they first made until they eventually got Photoshop 1.0 which later got sold to Adobe and they then released it in 1990. Ever since 1990 more people have became aware of this programme and has has a massive influence on them to make a picture of their own into a perfect piece of work. Also since 1990 more versions of Photoshop have been created and released each with new features, tools and ideas. Due to these new versions being released, and making them better than the last one, people have been able to create more precise and amazingly professional images.
Photoshop has influenced the photography world more than any other as a photographer can open an image of theirs into Photoshop and then make it better or add all sorts of things to it to make it look a lot better and then possibly sell it. It influences them because it gives them things to do to an image which could never have been done to this extent in any other image editing programme. As Photoshop has progressed with new features, versions and upgrades, it is possible to make a perfectly realistic picture from nothing other than a blank canvas and every tool you need in Photoshop. Here is an image of Photoshop 1.0 and another of Photoshop cs5, the most recent version.


flaming-photo-effect

http://en.wikipedia.org/wiki/Adobe_Photoshop

Tuesday 1 February 2011

3D Piano & smashed glass.

I staerted off by getting an image of a piano and then opening then up in photoshop and duplicating the layer. I then named one layer blue and the other red. I then selected the blue layer and adjusted the curves to a red channel and made the input 251 and the output to zero.  I then, on the red layer, done the same process but adjusted the green channel. I then moved the blue layer to the left slightly. then i changed the blending options to screen on the blue layer. After all of this it gave the piano a 3D effect through 3D glasses.

I then did the same process to an image of smashed glass and ended up with this.

3D Typography

I started off by creating two separate pieces of typography on a website called wordle. I then saved these images as pdf's then opened them into photoshop. After this I got rid of the backgrounds of both typo images and dragged on onto the other so i had 2 typo images on one canvas. I then created a text layer saying my name and placed it between the two typo images layers. I then added a background layer which was black to make the text easier to see. After this i made the 3 images of text into a 3D postcard from layer. I then 3D merged these 3 layers so it was one as a 3D image. I then used the 3D object rotate tool and used this to make the images further apart in a 3D angled view. I then added a guissan blur to the top layer of typo to make the layer syain my name stand out more. this was my Final outcome.

Wednesday 19 January 2011

Time Plan

For this unit i have to create a time plan to keep track of what needs doing and what has to be complete. I made my time plan in Microsoft excel. I put a title at the top and the dates down the left hand side with the tasks for those dates in the column after. I then added some edges in format cells to make it easier to understand.


Tuesday 18 January 2011

I made this image of typography on a website called wordle.com. I had to type loads of words into a box based upon me and then once i was done it made them into a typo poster. I could the change the colour and edit the fonts and style of the words as well as the layout. this is what I made.


Wednesday 12 January 2011

Proposal

In my project a I will be using photography as a big part of it. I will be using photography to hopefully take some pictures of bmx's in a local bike shop. I can then edit these images how i want them and place them into my website either on a image page or in the background images of each page.Also in my project i will be using fonts as i will be using text and images with letters involved. I will also be using some audio or sound effects in my website as a button gets pressed a sound of a bmx wheel will play or something similar. Also i will be using vector drawing as i will be making most of words, title, buttons, backgrounds in photoshop and flash as well as using these programmes to edit pictures that i have taken. I will also be using the internet to a certain extent as i will need possibaly a few pictures or text.

A history of Logos Research

The history of logo design and logos dates back to Greece in ancient times. The word logo means a name, symbol or trademark designed for easy recognition. Logo design history had it's humble beginnings as a cipher consisting of a single letter, and later a design or mark consisting of two or more letters intertwined. The cipher may be either all the letters of a name, the initial letters, or the surname of a person for use on stationery, business cards, or elsewhere. nowadays logos are used in company business'such as car manufacturers, restaurants, games, game company's, schools, colleges, universities, clothes branding, beauty and therapy products and many more.


The image I have used here is a cipher as it has the letters R, S and C interwoven within each other.


Magazine & Double Page Spread Research

After looking at several magazine covers on the internet i noticed that most of them have a big bod colourful title which stands out. They also contain a lot of images on the front of them and most of these images have a caption to explain a little bit about what that image is representing. The magazine covers that I have been looking at also mostly contain a bit of text on the cover which says what's inside of the magazine. They also have the price and bar code for the magazine being sold.

I also started looking at double page spreads after the magazine research and noticed that they are not too different in comparison. The double page spreads that i looked at also had a big bold title which was colourful to catch the buyers attention. Most of them also had one big main story on the front which involved a big image of something to do with that story. The double page spread also had several other images and lines of text about  other stories inside the of it. they also had a price and bar code as well as the magazine.

Tuesday 11 January 2011

Capture Method Plan

My method of capture that I am going to be using is photography or still images. Photography today is the process, activity and art of creating still pictures by recording radiation on a radiation-sensitive medium, such as a photographic film, or an electronic sensor.Light reflected or emitted from objects form a real image on a light sensitive area pixel array sensor by means of a lens in a device known as a camera during a timed exposure. The result on film or plate is a latent image, subsequently developed into a visual image. 
Photography in the past was very different than what it is today. The first type of camera invented was the pinhole camera. A pinhole camera is a simple camera without a lens and with a single small aperture effectively a light-proof box with a small hole in one side. Light from a scene passes through this single point and projects an inverted image on the opposite side of the box. As far back as the 4th century BC, Greeks wrote on naturally occurring rudimentary pinhole cameras. For example, light may travel through the slits of wicker baskets or the crossing of tree leaves


.